Showing posts with label DIY projects. Show all posts

Monday, September 27, 2010

Our Save the Dates: Are Finally Done!

Whew! That project was a lot more work than I anticipated, but so much fun! I still can't believe we did it. We made our own Save the Dates! Yay! Fabulous ones, too! Big, lovely magnets with our awesome engagement photos on them. Double score! Now, since I made you wait so long to see the final product, I thought I'd let my adorable pup, Rocko share the first look. Isn't he cute?


I'm so happy with the way that the envelopes turned out. Especially the labels.


It's what's inside that counts, though.


We chose three different designs for the magnets.

The first is my favorite:


Notice that we rounded the corners, like Mrs. Sunrise!

Here you can see the piles.

I'm so glad we're not having a big wedding (well, not too big).

I can't imagine making 200 of these puppies!


All ready to go! We just have to stamp 'em!


Tell me about your save the dates.

Did you make magnets? How did you package them?

Sunday, September 26, 2010

Our Save the Dates: The Legwork

Beware: This is a picture-heavy post... 

Before revealing our Save the Dates, I thought would share the how-to story. That way you have to suffer with me through the process, just as I did (muahaha!). Remember, I explained the roadblocks and hiccups we experienced trying to put them together? Well, they did, eventually, come together, one step at a time!

Step One: Making the Envelope Pretty:

Heating Tool

Lightly stamp the top left corner of each envelope:


Cover the stamped area with embossing powder:


Dump the excess embossing powder from the envelope:

Note: I flicked the paper a few times to get rid of the excess powder and quickly learned that is not the best method. It causes some of the powder to fall off of the stamp part, which is actually where you want the embossing powder to stay! A much better idea is to blow on the paper, which clears the extra powder, but allows the bulk of it to stick to the stamp.


Heat the portion of the envelope with the stamp + embossing powder with the heater and voila:


Step Two: Dressing the Magnet:

Ribbon (we chose green to match our envelopes)
Cardstock
Computer + Ink 

I knew I wanted to include a small note in with our save the dates. It wasn't enough for me to just throw the magnet in an envelope. So using the ribbon below, we tied a bow to hold our note.


I typed "Please Visit OurWebsite" in two columns in a document on the computer and printed it on cardstock. I cut up the pieces using a cutting board and rounded the corners:


Using a hole puncher, I put a whole in each note so that we could attach it to the ribbon. Here are a few pictures of Mama Brooch assembling the ribbon and labels:


Step Three: Addressing the Envelopes:

Computer
Printer
Cutting board
Sticker Machine

This was the last piece of the puzzle. I just had to figure out how to address the envelopes and we were done! At first, I was going to use the label below found via The Knotty Bride, but the polka dots weren't quite what I had in mind. Problem is this was the ONLY pink address label (free printable label, that is) I could find online:


It took me about a day to figure out something better. Something told me to try to make the label myself on the computer... We've all had those moments, huh? So I hopped on Microsoft Word and started playing around, adding text boxes, and borders.

Low and behold, my own little perfect labels:


I ran each label through the sticker machine, because it's only 2.5 inches wide (And guess what? I broke one trying to refill it! It was definitely not pretty! Woosah!). Eventually, I bought full sheet labels. It was a lot faster and more cost effective than the sticker machine. 


Then, finally, after all the pieces where in the envelope, I sealed it with the label: 


How did you create your Save the Dates? 

Stay Tuned, Up Next: The Reveal

*Sorry for the picture quality. Our website and wedding date, names, everything was on everything! I had to do some major blurring, hopefully you don't mind.

Saturday, September 25, 2010

Our Save the Dates: A Sneek Peak

It took me forever to figure out what I wanted to do for our save the dates. Starting was difficult. When I thought I decided, I would change my mind , and then change my mind again. I would start a project or get a really good idea, get discouraged, and be back at square one.

Know what saved me? Weddingbee. Mrs. Sunrise, in particular shared her fabulous DIY save the date magnets and envelopes, and I was inspired! I literally ran home to re-start ours and get them done. Once and for all.

It didn't go as smoothly as I would have hoped. I hit quite a few roadblocks. The first being finding a program that would allow me to add text to our pictures. Again, know what saved me? Yup, Weddingbee. I started a thread on the boards - literally desperate - asking for advice on design programs (that didn't involve knowing adobe programs like photoshop or having a mac). Someone told me about picnik and I am forever indebted! Wow! What an awesome website! I can't say enough good things about it. It was exactly what I needed. My saving grace.

Once I got our picture squared away, it was time to submit it for the magnet. I ordered about 25 just to test them and guess what? They were hideous. Seriously, we looked like martians. We were orange. I guess I got a little too carried away on picnik and enhanced the colors too much. I also added a border (which the Overnight Prints strongly recommends you do not do), and geez, I thought, "Can we please catch a break!" It felt like we were never going to get them done.

Mr. B encouraged me to contact Overnight Prints and ask for a refund. They did even better by offering to reprint them, walk me through the process, approve my image, and guarantee good quality.When they arrived, everyone fell in love. We were so happy too, because we finally had pretty save the dates. We finally had something to work with. Finally, something went our way. So we ordered a bunch more. 

Think the struggles ended there? Think again.

There was the packaging to consider. If I thought getting started and designing the save the date was tough, I didn't know what was coming! Figuring out how to decorate the save the date (just putting the magnet in the envelope was out of the question) and embellishing the envelope (heck, picking out the envelopes), was like opening up a whole 'nother can of worms.

To make a long story short, after three trips to Paper Source, two trips to AC Moore, and some serious fiddling with Microsoft Word (to create the labels), I finally had it all figured out. You can just image my excitement when it came time to assemble!!

This was what my workspace looked like (actually, it was a lot messier, but you get the idea):


Note all of the supplies. Who knew making your own save the dates would entail so much? I had a cutting board, sticker maker, corner rounder (or whatever you call that thing), ribbon, save the date stamp and ink pad, scissors, and um, oh yeah, the embossing heater, which is not pictured here (links to all of these things will be in my next post).

Also, note the coffee. I tend to drink a lot of coffee when I'm slaving away on big projects. I was cutting, then sipping, stamping, then sipping, embossing, then sipping, rounding corners, tying bows, and you guessed it, sipping.

The coffee was working, too. See how much progress I made. Definitely on a roll:


I don't want to spoil the surprise, but here's a little sneak peek of the actual save the date:

I couldn't be happier with the final result and seriously - I never thought I'd be able to say that. This was definitely a labor of love and my advice to other brides out there is to start early! I'm doing these just a week before they need to be sent out, which was not a good idea. We're way too close to the deadline and that's stressful. I've learned my lesson. I know the invitations are going to be way worse, too, so that means I need to start, um, yeah, pretty much yesterday.

A bride's work is never done!

Did you hit any roadblocks in the process of creating your save the dates? What saved you?

Tuesday, August 17, 2010

DIY Bridesmaid Dresses

I Find Wedding Inspiration Everywhere

You know how when you're engaged you see something in the store or online that totally encompasses everything you want your wedding to be? Your dress to be? Your flowers to look like? Favors? Cake? Your inner bride starts doing backflips and you think, "Eureka! This is it!"

Yeah that happens to me almost everyday. I can literally be walking through the grocery store and think, "Ou! Cherries! Those would be awesome favors!" Or walking through the flea market, see hankerchiefs, and think, "Should I buy these? Oh my gosh! We could use those!"  

I've Always Got Our Wedding On The Brain

I wish I had the kind of money to buy everything I see that I love and think we could use for our wedding, but I just don't have that kind of dough. So what do I do? I take a picture.

I don't know what I would do if I couldn't take pictures with my phone! 

Take this cute dress for instance. I saw it at Forever 21 while I was shopping for an outfit for myself this weekend. I thought "This would be such a cute bridesmaid dress!" Then of course I realize that my girls might not agree. I realize I'm at Forever 21, the dress is pretty short, and the sizes run really small. I still wanted a picture though.


Then I got to thinking, I wish I was brave enough to let my BMs pick whatever dress they wanted and do the whole mismatched thing. I really, really like that look. I've had my heart set on it for awhile, but then I started to get a little gun shy.
 
Be A Brave Bride

It's not because I think my BMs won't pick nice dresses. All of my friends (seriously) have emaculate taste and a sense of style I envy. It's just that I'm afraid it will look weird. Too new age for our families. Too out-of-the box. I need to get over what other people think though, right? I need to be a brave bride need to do what I want. Cause at the end of the day, there's no denying how much I love this style.

How cool is this wedding party? I love it. I absolutely love it.

so terribly sorry, but I lost the source 

Taking the Easy (or Not) Way Out

The next best thing to mismatched dresses would be the same dress in different styles. It's a trend that's been gaining popularity over the last year and designers like Two Birds are exploding on the market. It's what I like to call the Easy Way Out. Brides are able to indulge in the urge to have mismatched, fashionable maid and BMs pick how they'll wear their dress. It's the perfect middle ground, right? Wrong.

Problem with Two Birds is that the dresses are really expensive, at least for my group. While I can tell my friends that the dress converts into 11 different styles and they're getting it all for the price of one gown, it still doesn't seem right. So. Back to the basics? Not quite. 

Thank God for Bride Bloggers

The clouds parted and the sun came up when I stumbled across these images this week. Obviously the color, being olive caught my attention:


Thinking Two Birds, right? I thought the same thing. Those cool convertible dresses in green! Yippee!

Nope.

Try DIY.

DIY?

Dresses?

Convertible Dresses?

This Brides Got Balls 

Don't ask me how I stumble across such an amazingly talented bride blog. These things, I swear are divinely driven. Lisa Welge, is a Sacramento Wedding Photographer and obviously a DIY extrodinare. While searching Google for images of convertible dresses, I came across the above photos and her post right here. Once I stopped hyperventilating, I realized the post was from back in 2009.

Wait whaaaa? That must means there are pictures of her maids in these dresses on her wedding day!! Ding ding ding ding ding!!! I quickly (almost frantically) searched her website. Show me the dresses on her friends, I thought! Please, God!

Ah!! Yet another Eureka moment for the record!

Absolutely stunning and with such special, personalized touches no doubt.


This Might Be The Solution To My Problem

Or I might be one ambitious sewer! The thing is, I have a sewing machine. I'm actually learning to sew. I got it for my birthday last year and I've wanted so bad to use it to create something (anything!) for our wedding. I know this is a big undertaking, but could this be a sign? How cool would it be to be able to make my BM dresses? My friends wouldn't have to spend a dime (Lisa said it cost less than $60 to make each dress) and I get to be a brave bride!

I started to think such a thing was totally preposterous, but then I saw a trail of breadcrumbs.

The source of all the DIY goodness.

The How-To (If You Dare)

Presenting the Infinity Dress and full tutorial right here from Rostitchery...


Isn't she cute? Do you think I could make them long dresses? I wonder what material I should use. I'm going to give this project some serious thought and consideration. I need to review the instructions and recruit a more skilled sewer for help. 

Am I taking on too much?

What big DIY project did you do?

Are you thinking of having mismatched BM dresses?

Bonus

Here's a great post on The Cinderella Project about this topic.

Friday, June 25, 2010

A Different Kind of Bubbly


When I fell in love with our venue, I didn't know that sparklers were prohibited from the property. Boo! I've always wanted sparklers. From the beginning, as we sometimes say. I knew from the beginning. 

Needless to say, I was really disappointed when I found out we weren't going to be able to have them. I sulked for a long time about it, but eventually, I realized the pros of our venue far out way the cons, and I just have to get over having sparklers.

My backup? Bubbles. Yes, bubbles. I'm one of thhoosseee brides. Haha. I wasn't sold on the bubbles at first, but thrift store hopping (my favorite pasttime), I found a bunch of packs of wedding bubbles for about 25 cents each (score!). It seemed like a sign! Hey! They're usually $1! What a steal, right?! I thought so.

I also got excited about decorating the bottles. That's going to be such a fun and easy DIY project. Right now they look pretty plain and boring, but of course, we plan on adding some color! Some pink and green. Woot Woot! I also was thinking of making labels or a sign that says "Love is in the Air," or something sweet like that! Ideas?

The morale of the story? Not all dashed wedding dreams have a sad ending. In this case, it turns out my sparkler dilemma has turned into a really exciting project and (as you can see from the pictures below) some really cool photos hopefully. Not to mention loads of fun for our guests (especially the younger crowd)!


Will you have bubbles or sparklers?

Did you have to revise some of your wedding plans when you found your venue?

Thursday, June 10, 2010

DIY Projects Gallore!!

News Flash!!

Austin Wedding Blog Featuring 43 DIY Wedding Projects for the Budget Bride!

That's right, 43 projects!! It's DIY heaven!! I'm so inspired by all of the ideas!

Here are a few of my favs:

Gorgeous DIY Invitations by Tulle and Feathers Blog. I think I love these because I'm craving invitations right now. I really, really want to find (or begin to create ours), so these totally tickle my fancy:

{Go here to see the rest}

I am totally doing this one! It's a perfect whimsy detail for our garden soiree. DIY Framed Chalkboards are spring-inspired and definitely shabby chic, one of my favoirte design combinations. Way to go Hey Gorgeous. This idea is genius!

{To see the rest go here}

Head over to Austin Wedding Blog and check out all the great ideas. Come back and tell me your favorite projects or if one you know of is not listed, share it here! Xoxo

Friday, May 28, 2010

Must Haves: Bright Colors and Pom Poms!


Yay for three day weekends!

Aaron and I are headed to his hometown of Williamsburg, VA, for some fun in the sun at Busch Gardens and Water Country! I'm super excited to spend some quality time with my babe! We've both been busy at work and at home, and haven't had much to hang out! We'll probably spend about 4 hours in traffic tonight (boo), but I think we'll get a chance to talk about a lot of these, including our wedding plans! I'm going to propose a few new ideas, one being our color scheme!

I found this picture about a week ago while I was surfing the web for images of living rooms -- daydreaming about our place -- and I absolutely love it! Of course, the various shades of green caught  my eye and I love the bright pink rug! I'm not sure how Aaron will feel about it since we had discussed a darker color scheme (see here and here), but since our wedding is right at the start of spring and no long in the fall, he might go for it! My fingers are crossed.

Isn't this room great?


I've been really drawn to yellow lately. I'm not sure why, but it's definitely a spring color and would be perfect for my week-after-easter wedding. I thought I wanted my girls to wear green (olive) because it's my favorite color, but I think yellow will stand out more and it will look beautiful on them (anything would really)! I especially like the yellow with grey, which is my men's suit color of choice.

What do you think?


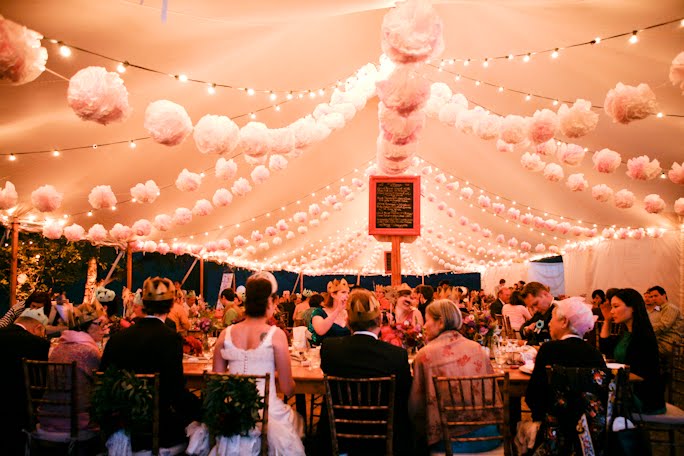
The other idea I want to share with Aaron is to use Martha Stewart Pom Poms to decorate various areas at our wedding! There are a few super bare trees at Oxon Hill in early spring (you can see some photos of this here and below) and I needed a way to liven them up!

My picture


I also wanted something fun to decorate and set our dance floor (see my post about this here), as well as a funky twist to the traditional fauxphotobooth. Here's a few pictures to give you an idea of what I have in mind:


What are your plans for the long weekend?

Have you come up with any new wedding day details? Share!


LinkWithin

Related Posts with Thumbnails
 
Template by suckmylolly.com